Saturday, June 28, 2014

Toy Universe Purchase

The annual toy universe was held at Takashimaya square till 29th June 2014 this year. Compared to the annual Craziest Toy Fair that is usually held in the last quarter of the year, Toy Universe has relatively less good bargain and less discount. For instance, the Bandai section was considerably small in the toy universe this, with emphasis placed on discounted gunpla, LBX and Power ranger (Bandai America). There was no sight of kamen rider, super sentai goods selling at insane low prices like what many people would be looking forward to during the annual Craziest toy sales. Neverthless, there was still good deals for other toys such as plushes, old transformer toys, tomica etc.
 
In recent months, I have been trying to exercise control for toy pruchases to save up more money. Altogether I visited Toy Universe four times and bought 2 items during the last two visits. Recently, I have gone into Tomica cars and was thus tempted by the discounted Tomica plarail, accessories and transformation sets. This Tomica sets which are usually packaged in huge boxes usually fetch high prices in local department stores. Of course, specialty shops such as Lets Play at Sunshine plaza is likely to sell at lower prices, somewhere near the cost of good master grades gunpla for simpler and smaller sets? Therefore, I have never bought any Tomica accessory/plarail/track sets except for the diecast cars.
 
 
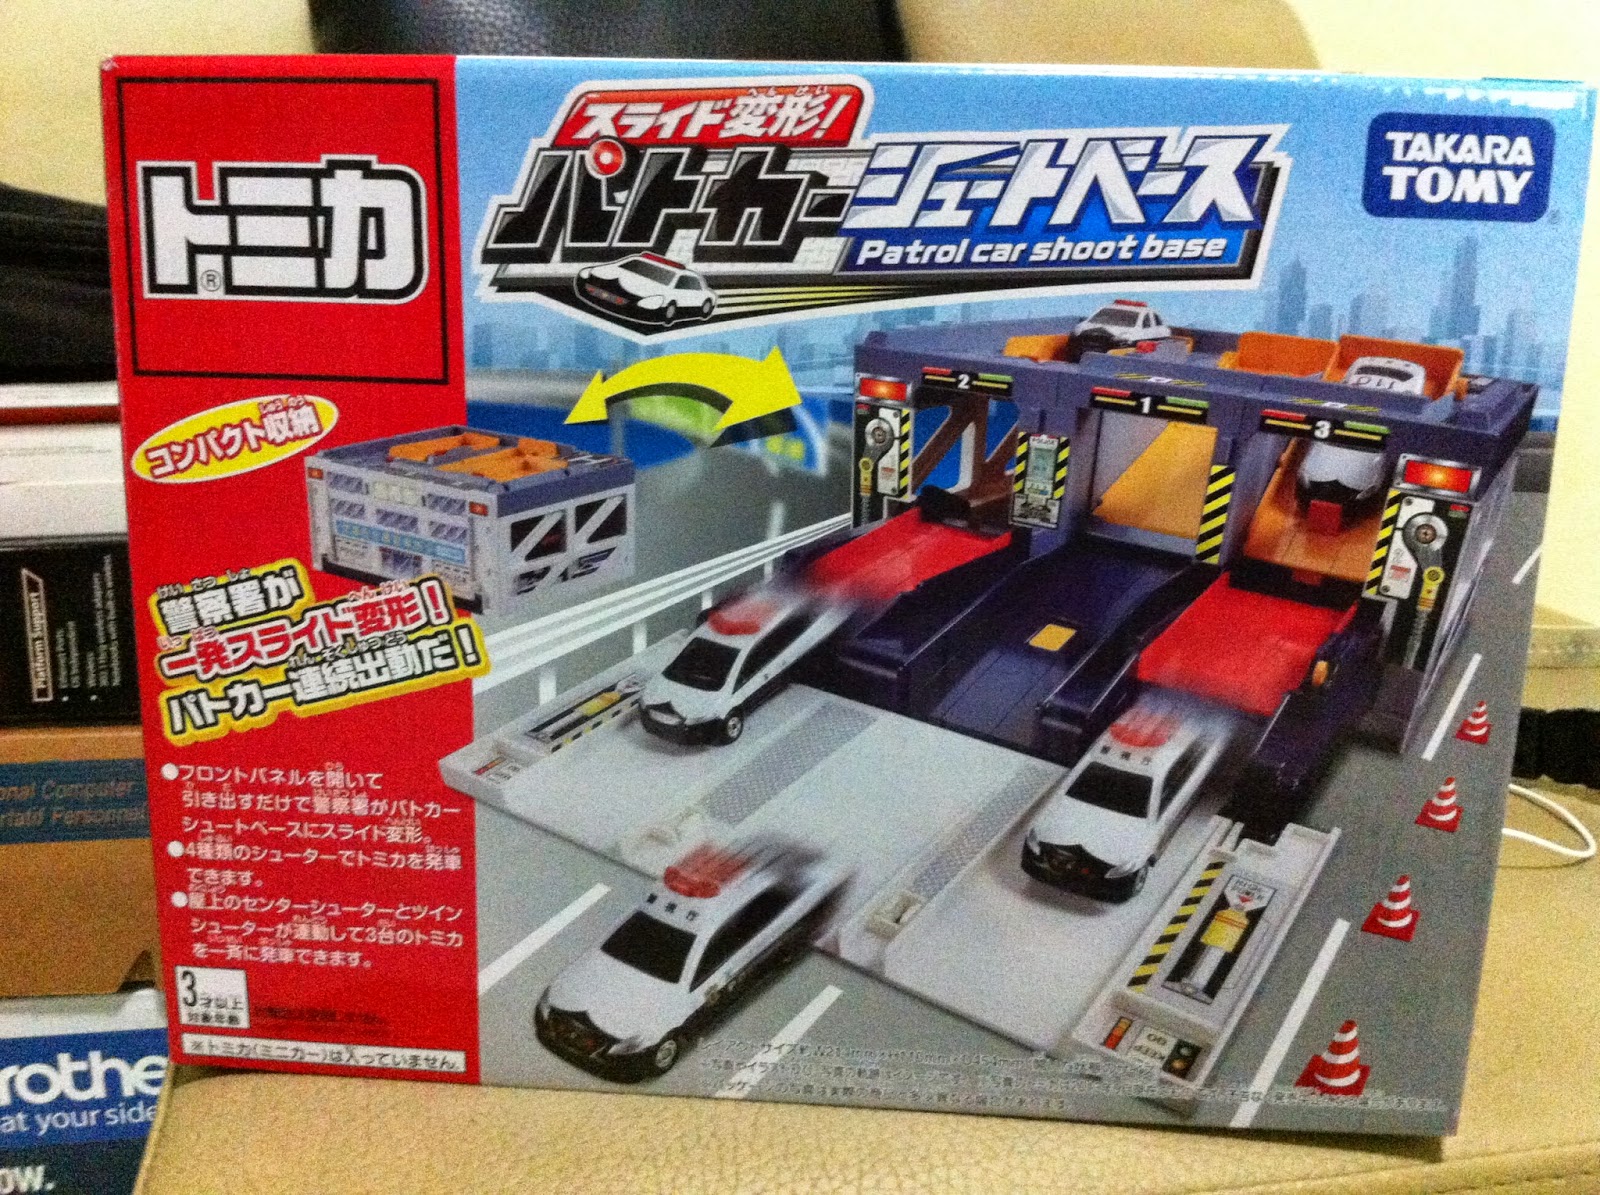
During the last visit to Toy Universe, I decided to buy a Tomica 'Patrol car shoot base' set. I had decided not to buy anything and was leaving the venue when notice the tomica sets on display. Many of the Tomica sets were going on huge discount. For instance some Plarail was going at 50% discount off original retail price. And this is actually a huge discount given that many of them were originally in the hundred dollar plus range. Other newer Tomica series were going at much lower discount. In the end, I decided to buy this 'Patrol car shoot base' set which was going at roughly 20% discount. It is quite rare to see Tomica sets on discount and I thought that this would be a good opportunity to try out a Tomica set to see if it has good play and fun value for future purchase consideration.
 
 
The 'Patrol car shoot base' set is relatively small compared to other more elaborated plarail or tomica car tracks/station sets going on discount at Toy Universe. The mail reason why I decided to buy the 'Patrol car shoot base' is because of the fact that it works like a police station model which can be put to good use in my display of patlabor toys. Also, this set does not require any batteries.
 
The front view of the 'Patrol car shoot base'. It is basically designed as a police station. There is actually a huge sheet stickers that we have to put on manually. I forgot to take any photo of the police base before I stick on the stickers but basically the base is originally in white, black and grey colours only, with some smaller parts in red and yellow. I was quite shocked to see gunpla-like toy with no colour when I first open the package. I had thought the 'Patrol car shoot base' would be designed and colour as shown on the package/box. Nevertheless, the police base looks quite nice when all the stickers have been applied.  

Side view of the base. You can see that the inside of the base is hollow and houses the tracks when the base is untransformed in the police station form.

The back of the base with a door that can be open.

The front cover of the base which can be opened to review 3 doors or tunnels.

We can further pull on the front cover to reveal the hidden tracks hidden inside the base!
 
 
Altogether, we can deploy 3 tomica police cars simultaneously from the 3 tracks available. The tracks has 2 sub levels. The lower lever is able to deploy 2 cars whereas the upper level is basically the roof top.
 
There are a couple of levers that can be pulled to change the angle of the tracks so that the cars slide down, in a sense being deployed or 'shoot out' form the base.


The roof top showing 3 tracks.

When the levers on the roof top are pulled, the tracks will angle down, connecting to the lower level tracks. Of couse cars that are deployed form the roof top will be able to go at a faster speed as they slide down from a taller height.
 
As my first tomica set. I find that  the 'Patrol car shoot base' has a relatively high fun and play value, especially for younger kids. However, I feel that the price is still on the high side even after discount. This set cost about 3500 yen originally and I paid slightly lower than original yen price when converted to SGD according to current exchange rate. Considering that the police base is not well coloured and depends on many stickers, I feel that the price could be set a little lower, although I do find that this toys requires certain level of engineering and design in the making process, which probably explain the high price.
 
I also bough a pokemon model kit during my third visit to toy inverse. It was sold at $8 but actually the original yen price is just around 571yen. There was a lot of this model kit during my first and 2nd visit to toy universe but it was so popular that there was only 1 piece left when I went on my third visit.

I had always wanted to try out pokemon model kit and this victinni model kit turns out to be nice as it actually uses very little stickers.

The only stickers are on the eyes and mouth. Even with painting, this victinni looks very nice. However, this is likely to be my last pokemon model kit. I have seen online reviews and other pokemon in this pokemon model kit series actually relies on quite a lot of stickers. Moreover, I have also stop buying and building gunplas for slightly more than a year. Gunpla has little play value once assembled and the main fun of gunpla is the building and painting process. Once they are completed however, there is serious space storage issue that we have to consider... 
Sunday, June 22, 2014

Gundam Head collection LED modification

 
I bought a blind box of Gundam head collection from HAG quite a while back and got this RX-78 head figure/scaled model. I have disposed of the box and having bought this about 1 year ago, I have long forgotten which design I was actually hoping to get. But I believe I should have been quite happy with the RX-78 since I do watch the original Gundam series, although only the movie versions. The RX-78 head design still look like a very modern Gundam design to me. In fact, I think this Gundam head collection is actually a very good trading figure series as we get quite a detailed scaled Gundam head for the price of about $10.90 or slightly higher price if I did not remember wrongly. Nevertheless, this RX-78 Gundam head continues to be the only one that I get from the Gundam head collection series due to the lack of storage and display space at home.

Apology for the low photo resolution. In the more recent posts, I have switched to using photos taken from my iphone 4 since their size are smaller and takes a shorter time to upload. It may not be clear in the photos but the RX-78 is very well panel-lined, with clear yellow parts for the eyes and nice off-colour for the white, yellow and red parts. One of the highlight of this Gundam head collection series is of course the rare one with LED light function included in the base. Probably we get only one of those in every box of 10 to12. I remember I was shaking the blind box to feel for the heavier boxes which may have a higher chance of containing the LED lights. However, there was this Gafran (Gundam Age) design in this series which I thought would cause the box to be heavier due to the Gafran's wider head design. In the end I chose the 2nd heaviest box and got this RX-78, which is not all that bad.
 
The main focus of this post is to record down how I have modified the RX-78 Gundam head collection stand to include LED function. This is my first and only attempt ever to modify a toy and till today I am still please with what I was able to achieve on my first attempt of modification. I am not sure how the original rare LED version works but I remember seeing from some review that one has to push down the Gundam head to activate the LED in the stand. As I have done this modification some time back, I am only able to show the finished product but I will try to roughly show what I have done to include LED function manually. 

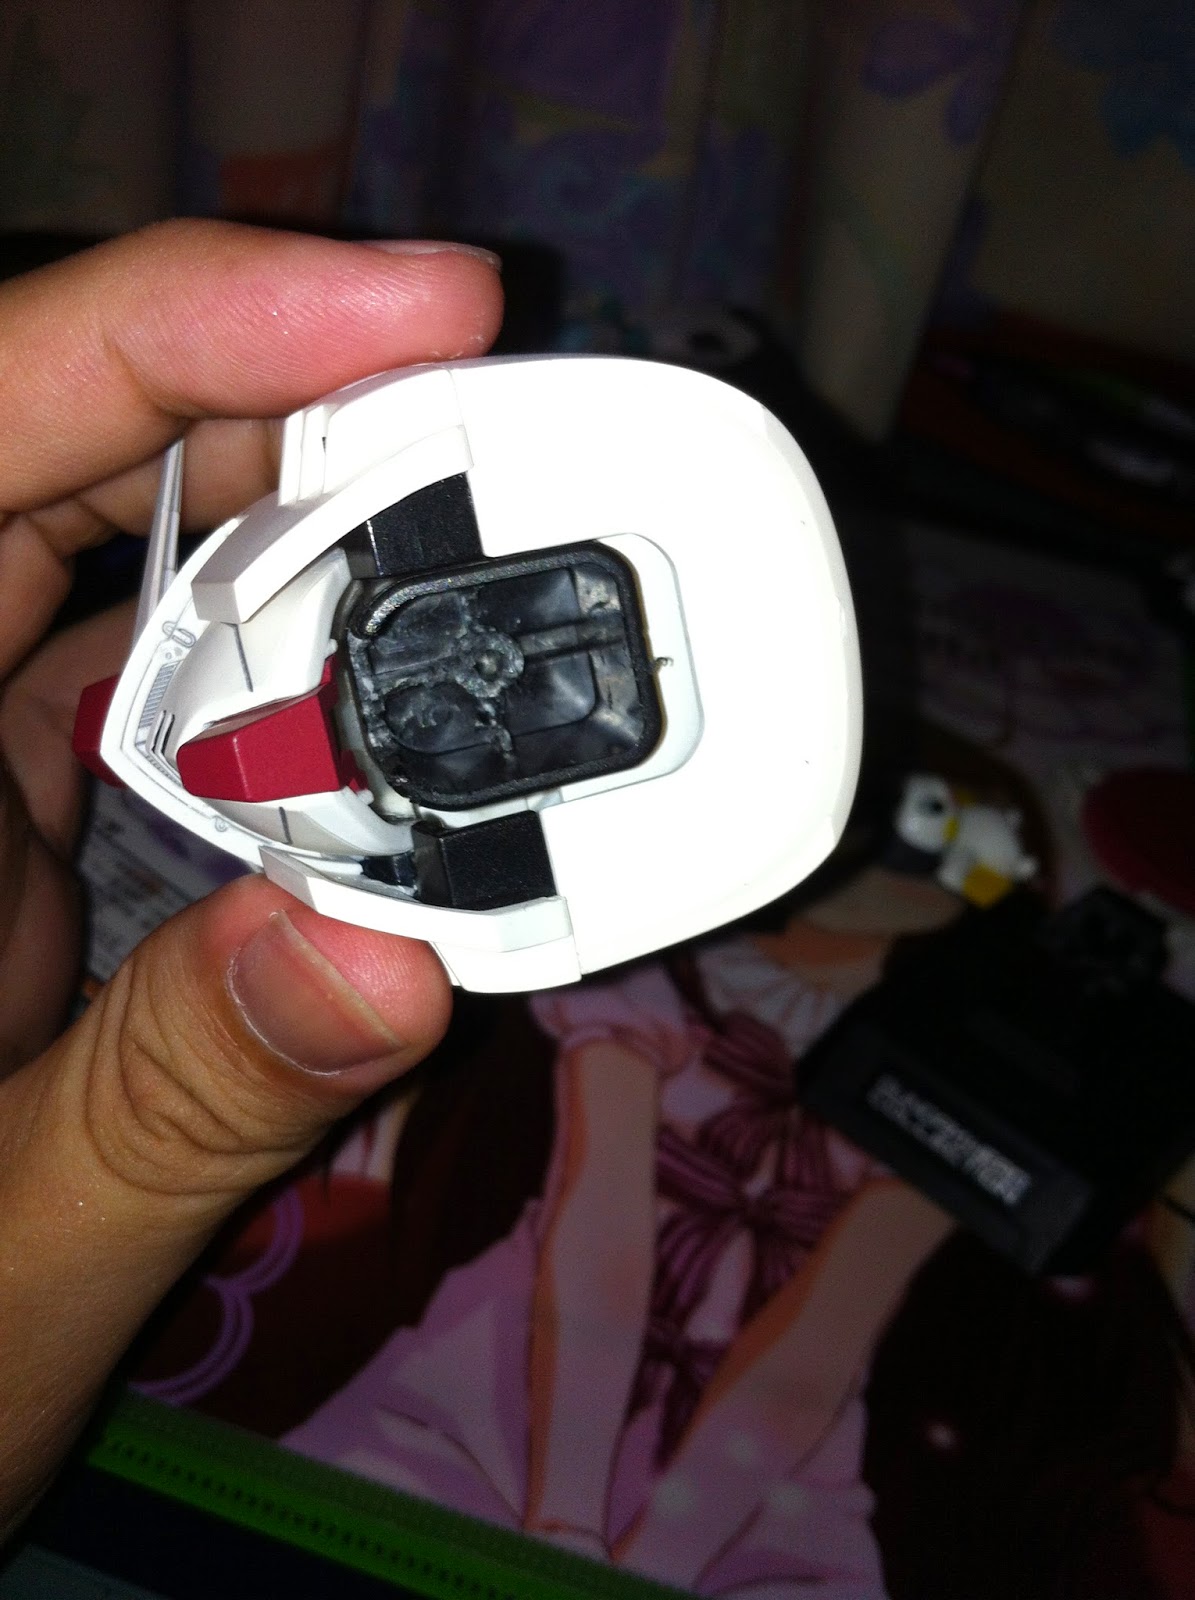
The photo above shows the normal Gundam Head collection stand without any LED function. Note that the protruded piece on which to attach the Gundam head originally consist of a upper rectangular part pegged to a wide base with protruded centre piece. In my modification, the LED is incorporated into upper hollow rectangular piece. On the upper end of the upper rectangular piece, there is a protruded peg that is supposed to fit nicely into the inside of the Gundam head.  In the photo above, I have stacked the upper hollow rectangular piece in the wrong direction, the protruded peg should be facing the back, not the front.

The above photo shows the two already-modified parts which make up the Gundam head stand. On the left, we have the wide base with protruded centre piece. The top of the protruded piece actually has a huge square peg to fit into the hollow bottom part of the rectangular upper piece. However, I have modified it by cutting the square peg into half. This is to make some space for the LED unit to be inserted into the stand. This was accomplished using a small saw that I found in my home's storeroom. It took quite a bit of effort to saw out half of the square peg, with a lots of plastic dust dispersed around the working table. On the right, we have the rectangular upper piece.  

 The rectangular upper piece is hollow in the first place which makes it possible to insert LED. The rare LED stand probably has the similar or identical design to the normal non-LED base to allow for quick factory production. They probably made further simple modification in the factory to create the rare LED stand.


 However, the original non-LED stand has no hole or wadsoever (if I remembered correctly) for LED light to be given out to the inner eye area of the Gundam head, even if a LED unit is inserted into the stand. Therefore, I had to cut out a rectangular hole on the front side of the rectangular upper piece. I have tried to mark out using red, the rectangular hole that I cut out forcefully using a normal scissor, in the photo above.
 
As for the LED, I actually dissembled a Kamen rider fourze LED head gashapon that I got some time back for $4. I have since disposed of the unused parts of the gashapon toy.
 
The bluish-green piece at the centre is the LED unit dissembled from the Kamen rider gashapon. The LED unit uses 2 small batteries.

As you can see, the LED light emitted will be red in colour as seen from the LED bulb. Note that I had to forcefully cut out the LED unit, trimmed some ends, so that it is able to fit into the modified Gundam head stand.

The LED unit will be inserted into the rectangular upper piece, with the LED bulb facing the rectangular hole which was previously made on the front side of the upper piece.

The 3 new components that make up the new modified LED stand. From left to right to top: the upper rectangular piece, the LED unit, the base with protruded centre piece. I hope you can keep up with my weird notations and naming.

It would be easier to first peg the upper rectangular piece into the inside of the Gundam head.

Upper piece nicely pegged into the Gundam head, with the rectangular hole facing the inner side of the clear Gundam eyes.

 Just a repetitive photo :)

Next, we insert the LED unit into the pegged upper piece. Notice that the LED unit is able to fit loosely into the hollow upper piece.

To make the LED unit more secure however, I tried to squeeze the LED unit into the side of the upper piece where the rectangular hole is. The LED bulb happens to protrude nicely out of the rectangular hole, so that it is positioned nearer to the inner side of the clear Gundam eyes. In this way, the LED unit is securely attached inside the upper piece by force of friction.

Last but not least, the Gundam head is simply place on top of the base. The Gundam head sit relatively securely on the base because the inside of the Gundam head has just enough space for the protruded part of the base.

The effect of the LED on the overall Gundam head model is quite satisfying. As can bee seen from the previous photo also, the LED light is able to shine through the face part too (although to a slightly smaller extent), other than the clear eye part.

Now comes the part which is a bit difficult to explain. The original kamen rider gashapon actually has a switch unit. However, in the process of dissembling the gashapon, the thin wire through which the switch unit was attached to the LED unit, snapped. As a result, I have to make do with manual connection for the LED unit.
 
 
As you may see from the photo (pls click to see the enlarged version for clear view of photo) above, one side of the connection consists of a thin naked wired with a resistor? The other side of the connection consist of thin wire wrapped in black rubber.
 
 I have tried to mark out the two ends of the connections using yellow and green.
 
Modified LED Gundam head collection RX-78 in its best in the dark. I really like this photo. I think it captures the beauty of the RX-78 head model. Although it could be much better if the LED were only able to shine through the eyes and other selected area of the Gundam head, this photo has gradually grown onto me. With the face plate light up like this, it looks more like a humanoid robot wearing a helmet (which we may argue is essentially what Gundam really is!) Of course the very fact that I make these modifications myself by trial and error, without reference to any online guide, makes it even more valuable. Thinking back, I wonder how I managed to convince myself then to dissemble a $4 gashapon just to modify a trading figure toy that is worth about 3 times as expensive, considering that it may not be a sure-successful attempt. Nowadays, I probably wont have the time and confidence to try such modification again
 

RX-78 Gundam head among other toys on my book shelf. It has been a full week since my last post. I have decided to try to update my blog once a week during the weekend so that I can hopefully conserve my momentum in writing post. You will notice that I have toys from Ghost in the shell, kiddy grade. I am thinking of doing reviews of them in my future post. Somehow I like old school anime series more nowadays, perhaps because of their simpler drawing style and plots.